Category Archives: Thrift Store

Wood shim shoe cabinet — and a prize contest!

Check it out, friends!

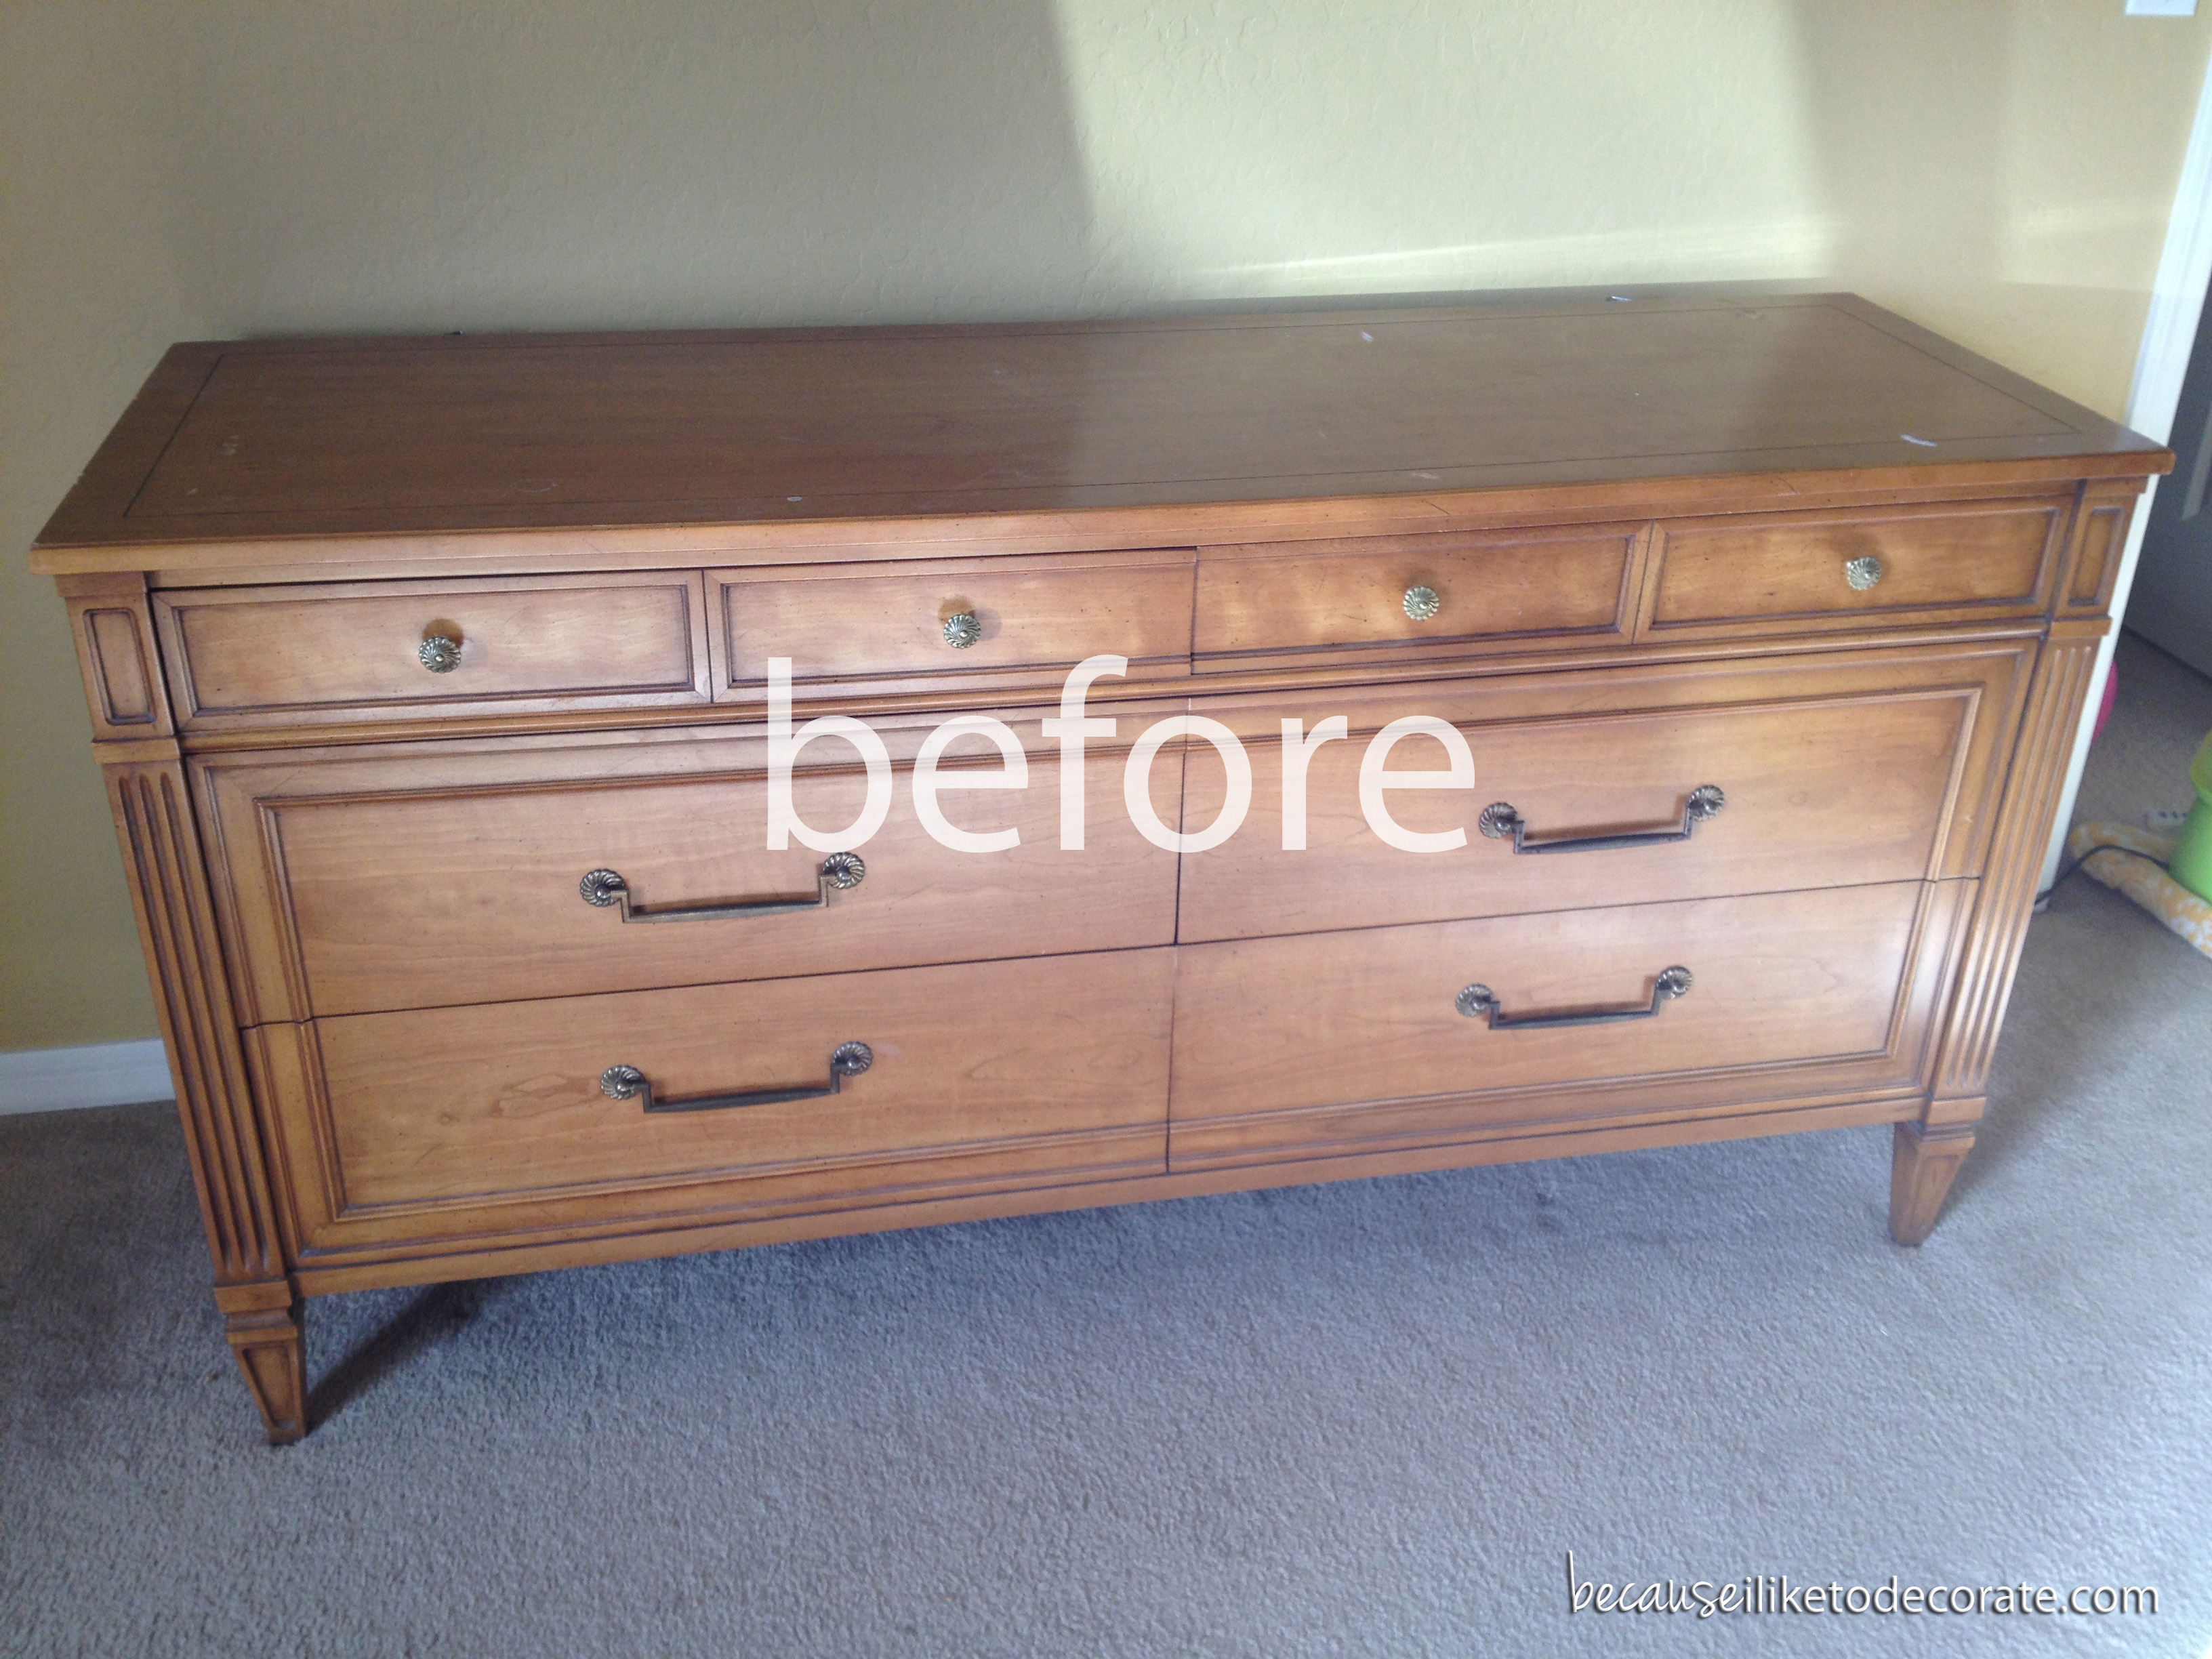
I picked up this bad boy at Goodwill for only $15! It’s actually a shoe cabinet — the “drawers” fold out! This is NOT a quality piece. Notice the paper laminate peeling from the corner of the before pic? This was a practical purchase for my family to HIDE THE SHOES! (Because shoes are always a problem.) Can anyone else relate?

Wood shim shoe cabinet  I  becauseiliketodecorate.com

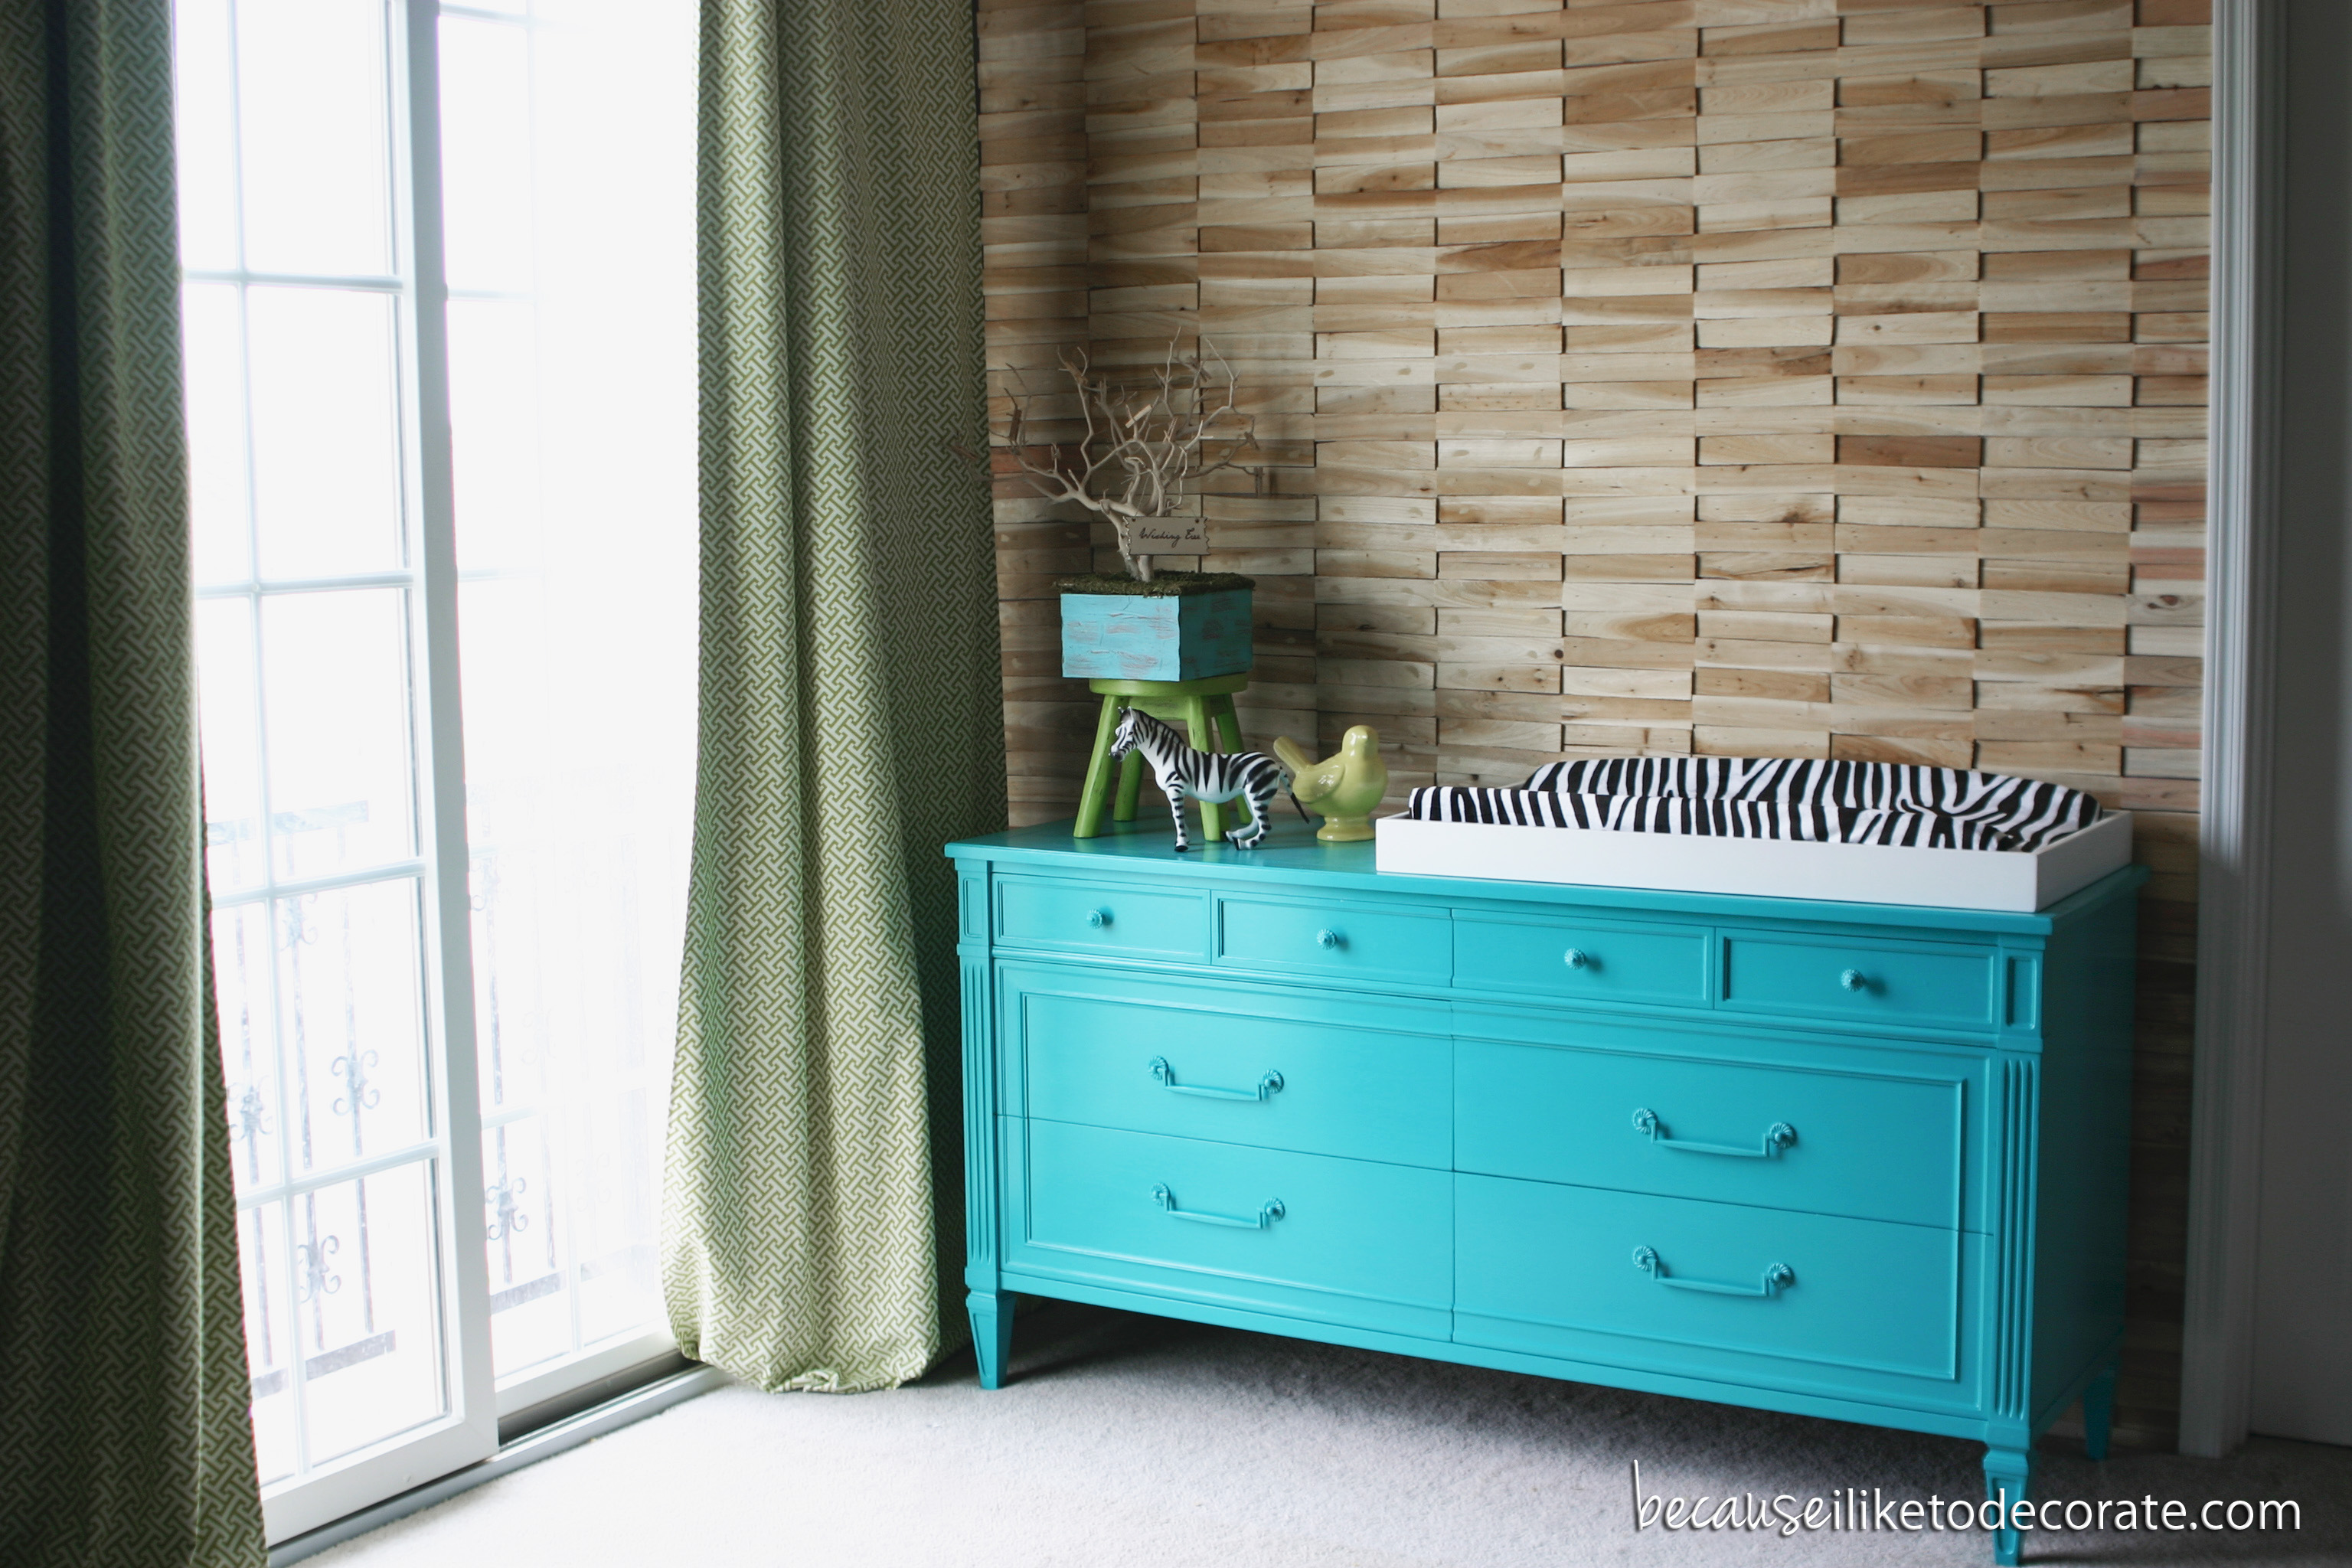
This is an example that shows just how much you can transform what was simply a boring piece of furniture.

You’re probably wondering what products were used, etc. So here we go. Let’s start with my paint choice for the exterior. I used Glidden’s Gel Technology High-Gloss Trim & Door paint in Bright White and also painted the knobs with the same paint.
Wood shim shoe cabinet  I  becauseiliketodecorate.com

After planning out my alternating wood pattern, the shims were stained with Minwax Jacobean and glued onto the face of the cabinet “drawers” using Liquid Nails. This needs to dry for 24hrs and you’ll need clamps to hold the pieces into place as they dry. I used a miter saw to make a few cuts, but you could probably get away with just a hand saw since the shims are so thin.Wood shim shoe cabinet  I  becauseiliketodecorate.com

Wood shim shoe cabinet  I  becauseiliketodecorate.com

The best part about this project is how budget friendly it was. Wood shims are about $1.25 for a pack of 12, and the paint and stain were both purchased for another project — so that didn’t cost me anything. That brings my total to only $20 for a custom shoe cabinet that has that high-end look without the high-end price!

Wood shim shoe cabinet  I  becauseiliketodecorate.com

Contest

Now let’s talk about the contest portion of this post! This furniture piece is nameless. If you haven’t noticed by now, I usually name each furniture makeover something that fits its new character and style. So what do you think? Do you have a name for him or her? There are many ways that you can enter and increase your chances! Annnnnnnddddddddd……GO!

UPDATE: I’m having a bit of trouble with WordPress accepting the contest widget (hoping to get this fixed). Please click on the giveaway link below to enter the contest! There are 8 different ways to throw YOUR NAME in the hat!

CLICK HERE TO ENTER THE GIVEAWAY!

THE WINNER WILL RECEIVE COFFEE ON ME, A $25 GIFTCARD TO STARBUCKS!

Starbucks logo

Lots of love,
Mary

Linking up here:


Furniture Feature Fridays

Garage truth

This is my garage stash: five desks, two dining tables, two dressers, two headboards, two accent tables, one coffee table, one armoire, and one decorative screen. I’ve got some work to do! #truth

Image

Found this on Instagram and just had to share! I was literally laughing out loud!

The good news is that I have something ready to show you tomorrow!

Lots of love,
Mary

Caspian Blue

Today was a fun day! Movies. Forts. Snuggles. Baking. Blogging. More Snuggles. And all the in-between. Sometimes a mom’s life is a whirlwind. I couldn’t tell you what all I did today… but it was a lot! I did take a few moments to snap some photos of a project I did for baby Jude’s room – A painted dresser/changing table. This was my very first experiment with High-Gloss paint!

I introduce, Caspian:
Caspian, blue dresser. Vintage HenredonCaspian is a Vintage Henredon Dresser that I picked up for a steal at one of my local thrift spots! The quality of this piece is remarkable and it was in excellent shape, save some deep scratches on the top of the dresser.
Caspian, blue dresser. Vintage HenredonThis piece is one of the few things I’ve painted where the original wood is so beautiful. <Don’t shoot me!> Trust me, I had a very hard time deciding. To paint… or not to paint, That is always the question. Once I decided that it was going into Jude’s room, I had my heart set on a bright teal high-gloss finish! There will be others to show restraint with.
Caspian, blue dresser. Vintage HenredonThe color is “Intense Teal” by Behr. I chose their Hi-Gloss Enamel for a super durable shiny finish. To help it adhere, I began with a coat of Glidden Gripper Grey. Gripper is an amazing primer that will literally stick to anything without flaking…even glass!
Caspian, blue dresser. Vintage HenredonThe choice to paint the hardware was an afterthought but really completes the look. Although this piece has a classical style, the paint has really transformed the look to more of a sleek modern or transitional feel. Perfect for my baby boy!
Corbinbluedresser4Photo bombed by a little cutie in the corner! My baby Gabby likes to be in front of the camera. (I wish you could see the smile on my face because this little one melts my heart to pieces!)

Sidenote: Nope, I’m not ignoring the fact that this dresser is standing in front of an AMAZING wood wall that I haven’t told you about yet! Thought I’d give you a little sneak peek. Truth is, it isn’t finished yet. I’m a little stumped on how to finish the wood. So maybe you guys can help a girl out!

Should I…
A. Keep the natural unfinished wood look?
B. Use Teak oil for a natural slightly darker finish?
C. Finish with a honey toned stain (Which would coordinate with the crib)?

Lots of love,
Mary

DIY Centerpieces

If you are one of the fabulous ladies from the San Tan Bible women’s ministry, you’ll recognize these photos! This past summer, I was blessed with the opportunity to design this year’s centerpieces for our church’s weekly women’s ministry meetings. I truly LOVE doing things like this and was excited to get started.

In an attempt to keep the budget as low as possible, I began to search the web for DIY inspiration. Again with the chalkboard paint, anything is possible! Simple boards cut to size from the hardware store, framed out with painters tape and painted. These can seriously be used and reused in so many ways! I purchased the yellow polka-dot fabric to add that pop of color, and incorporated a cut square of striped wall paper that was actually a thrift store find from a few months ago.
centerpieces

Real mercury glass is expensive! But luckily, clear mason jars are not! Especially if you get them at Hobby Lobby on a day when glassware is 50% off! Just type “mercury glass” into the Pinterest search field and you will literally stumble upon a dozen tutorials. They all basically give the same instructions. 1. Lightly spray the inside of your glassware with a 50/50 mix of vinegar and water. 2. Lightly spray the inside with “looking glass spray paint”. 3. Wait to dry. 4. Repeat until you get your desired look.
centerpieces2

The natural elements of the wood block as well as the twine add just enough warmth to make it all work. I’m really happy with them and can already think of a million ways to recycle each piece of this project when the year ends… it’s just in me!
Lots of love,
Mary

Joy – A Pocket Full of Sunshine

Hello Friends,

I’ve been painting… and I’ve got a special piece to show you! Her name is Joy, for obvious reasons. She’s so bright and cheery and gives life to almost any space — a pocket full of sunshine!

I didn’t venture too far from her original color, a yellow tinted wood vaneer. This piece was found at my local Salvation Army and has solid dove-tail drawer construction with wooden gliders (The two things I look for when determining the quality of the piece.)

I can’t begin to tell you the paint color of this piece. Lets just say it’s a custom mix. It took me awhile to achieve just the right shade. Sometimes I don’t know what a piece is going to be until I get started, and then it just evolves. This was one of those times. I brightened her up and went for a vintage, mustard-yellow tone.

After two coats of the base color, I was anxious to add some detail work to what was a simple frame. Rather than using a stencil, I decided to freehand a crisscross pattern on the top two drawers for a more organic look. Yes, it would have been quicker and easier to use a stencil, but I wouldn’t have gotten such a custom look. I love the imperfection! And when you step back, it adds just the right amount of texture.

I also painted the handle dowels in Behr Off-White to balance out the top detail work. Joy was finished off with a coat of Annie Sloan Soft Wax in clear and aged with Annie Sloan Dark Wax. After cleaning and polishing the brass hardware, she is now ready to show her colors!

I really love how Joy looks in front of the grey wall! I’ve posted this piece on Craigslist here. Hoping she will find a good home!
Lots of love,
Mary

The History of “Grace”

As you have probably noticed, I didn’t post a furniture item yesterday. You see, I had to return the 5th item (the headboard). Somehow it got damaged between purchase and pick-up and my husband came home with just a piece of molding that wouldn’t do. Time to go shopping again!

Did anyone notice the painting that hung above “Rose – A Coral Beauty”?

I found him from the Salvation Army for only $2.50! I normally just glance at the photo section in thrift stores (mainly looking for good size frames with the intentions of throwing the existing artwork away), but this painting struck me! I’m drawn to how solemn the man is. He took the time to set his glasses down before giving thanks. He doesn’t appear to be particularly wealthy, but shows such reverence and gratitude. I did some online research and found that the print originated from a photographer by the name of Eric Enstrom in 1918. Enstrom, while speaking of this photo, said, “I wanted to take a picture that would show people that even though they had to do without many things because of the war they still had much to be thankful for.” The full story can be found here – a website run by the Enstrom family. They are still selling reprints online today. I’m so happy I found it! Although my print seems to be one of the older ones, it probably isn’t worth much due to the scratches and general wear — but “Grace” is just perfect to me!
Lots of love,
Mary

Jack – A Sophisticated Writing Desk

It’s day two, and boy have I got a fun one for you! Eeeeeek! I’m excited! Introducing Jack, Union Jack that is:

Jack started out as one of your basic large scale desks that are a dime a dozen at the thrift stores. You know the ones that you would picture lining a government office somewhere in the 1970’s?

I’ve been waiting for a piece to paint the famous Union Jack onto. This desk was simple enough to pull of such a grand image and the scale of the desktop was a perfect 30″ x 60″!

The base is a custom mixture of Behr Midnight Dream (two coats), and the desktop Union Jack design is done with Annie Sloan Chalk Paint (ASCP) in Old White and Glidden Red Delicious. After complete, I did a light sanding with a medium grade sanding block, then finished with Annie Sloan Clear Wax (Applied with a brush and buffed smooth with a dry cloth).

Since the edges of the piece were distressed a bit to show the wood underneath, I chose to leave the wooden legs exposed. I just polished them with Annie Sloan Dark Wax and they shined up nicely!

I’m sad to say that Jack has already been sold! But he’s staying in the family, so I can visit anytime! :)
Lots of love,
Mary
Linked up here:
Furniture Feature Fridays

Jane – A Contemporary Farm Table

Day one of my self inflicted five day challenge of painting and posting one piece of furniture per day. I decided to start with the dining table. Go big or go home right? Meet Jane:

She was in bad shape when we picked her up from one of our local thrift stores. Notice the table top varnish is cracking and chipping off?

The base is a retro contemporary design that looks to be from the 60’s era, matched with a thick tabletop. She needed to be brightened up a bit and I knew that I wanted to take advantage of all the knicks and scratches on the top!

I started with a light sanding by hand to make sure there weren’t any rough edges. I then took a watered down solution of Annie Sloan Chalk Paint (ASCP) in Old White, and began a random pattern of brushing on and wiping off until I achieved the balance I was looking for. Next, I applied one coat of Annie Sloan Clear Wax (applied with a brush and buffed with a clean dry cloth), followed by one coat of Annie Sloan Dark Wax (also applied with a brush and buffed with a clean dry cloth) over the entire tabletop.

This was the first time I used the dark wax so liberally, and let me just say that I LOVE the result! I would totally keep this table for myself if it was the right scale for my dining room!

I chose ASCP in Duck Egg Blue for the base — Just one thick coat, distressed, with a coat of clear wax to finish.

The base brings in just a little pop of color that accents the natural looking tabletop so well!

This was such a fun project, one of my favorites for sure! I can’t wait to paint my next dining table!

Jane has been posted on Craigslist here.

Lots of love,
Mary

Shopping!

Hello Friends! Have you missed me? The day-to-day can get a little crazy with three kids four years old and under! I keep telling myself that its okay not to be wonderwoman for a couple months after having a baby. Titus is settling into a nice little routine, where I can now start to plan out my days a little better. I’m ready to restock my inventory and start moving furniture again!

This past weekend, my husband graciously chauffeured me around town thrift store shopping! We loaded up the kids and went hunting for treasure, i.e. furniture to paint. I scored two desks, one dining table, one end table, and one headboard all for ridiculously low prices. Here is my goal (typing it out loud for all to see): For the next five days I will be posting a different finished piece! That’s right, a marathon of furniture painting! I also can’t wait to catch you all up on the progress in both the girls’ room and baby Titus’ room!

Here’s a little sneak peek at one of the desks I scored!

Lots of love,
Mary

Passez le biscuit!

I picked this title not because I have any biscuits to share (sorry), but because it’s the only French phrase that I know. :)

I found a very ornate French-styled coffee table at one of my local thrift stores and couldn’t wait to get my hands on it! I’d been waiting for a piece like this to pop up so that I could play around with layering techniques — and she was just perfect! Take a look at the final product:

The piece had these beautiful marble-styled inlays with grey tones, so I instantly knew this was going to be a grey table. Here’s the before pic when I found her in the thrift store:
The table has lots of detailing, which is what made this project so exciting! First layer: I used one coat of Annie Sloan Chalk Paint (ASCP) in Old White to highlight the detail work and the edges of the table.
Second layer: two coats of ASCP mixture. I didn’t have any Paris Grey on hand, so I mixed some Pure White with Graphite to achieve close to the same color — and it worked! Once dry, I used a medium-grade sanding block to distress all the detail and edge work. This was fun because both the white layer and the wooden base started to show through!
Third layer: one coat of Annie Sloan Clear Wax buffed to a light shine. Fourth layer: AS Dark Wax! Working with just one area at a time, I lightly brushed a tiny amount of the dark wax into the detail work and the edging then wiped off and buffed with a dry clean cloth. I just love this technique! When looking closely at the final result, you can see all the layers. It has the appearance of a perfectly aged French antique!
Lots of love,
Mary