Category Archives: Kids

The Busy Mom’s Guide to a Successful Garage Sale!

We had a garage sale this past Saturday, and it was a HUGE success! We made way more money than we expected, and the best part was getting rid of stuff that had been cluttering the house! It went so well that I think we may put out what’s left for round two this next weekend. I figure it’s already organized in the garage and ready to go. I’ve learned there are some misconceptions when it comes to having a successful garage sale. There are also some things that we could have done better — things we plan to do next weekend for round two. So here I’m going to share with you my HOW TO HAVE A SUCCESSFUL GARAGE SALE — FOR BUSY MOMS!

How to have a successful garage sale // for busy moms  I  becauseiliketodecorate.com

1. Start gathering your garage sale items. First step is to go through everything in the house and set aside stuff to sell. Don’t be a hoarder — if you haven’t used it (or worn it) in a year, you probably don’t need it. Identify space in the house or garage where you’re going to collect your garage sale items so that they are all in one place and ready to go. I have a space in the garage where I collect garage sale items year-round.

2. Don’t price your items ahead of time. That’s right, you didn’t hear me wrong. Who has the time? Most people will tell you to price everything out and have it neatly organized, right? Well, I’m telling you NOT to price your items. Why, you ask? Well, how many times have you been at a garage sale and passed something up because the sticker price was more than you were willing to spend and you never spoke a word to the owner? By NOT pricing your items, it forces the buyer to ask you what the price is. You then know they are interested and can open up a dialogue and get to a price that they are willing to spend. I sold so many items just by a little negotiating. Garage sale customers like to get good deals… that’s why they’re shopping at garage sales! Which brings me to number 3…

3. Don’t price things too high! Discuss high-ticket items ahead of time to identify your starting price and your lowest price for the item. But remember, this is a garage sale and people expect a deal. It’s okay to hold firm to a price if you know that you could sell it on eBay or Craigslist for more. But otherwise, remember the goal is to get rid of stuff!

4. Display items neatly. I could have done way better with this one! Display like items together on tables and when possible hang your nicer clothing items. When your items are displayed neatly, it gives the impression that you take care of your things and that they are nicer items and people will pay more and be more likely to buy.

5. Advertise. Piggy back alongside a neighborhood sale or neighbors who are also having yard sales. This garners more traffic to your home. You will also want to post some of your high-ticket items individually onto Craigslist ads and direct traffic to your garage sale through those ads.

6. Create good signage. Have you ever seen those garage sale signs that are barely readable? The ones where you have to slow down and squint just to see where to go? Don’t be one of those! The best signs are simple, large print signs on brightly colored paper. I just write “SALE” in large capital letters and draw an arrow to show the direction they need to go. Neon colored card stock is inexpensive and will do the trick. Don’t over-think it!

7. Involve the kids! We kept the girls busy by giving them something to sell — Gatorade was the perfect treat in 100 degree weather! And it was a fantastic learning experience for them. They just loved being a part of the whole thing!

How to have a successful garage sale   //    for Busy Moms  I  becauseiliketodecorate.com

8. Donate what you don’t sell! You’ve already gone through the trouble to de-clutter your home, so why bring the stuff that doesn’t sell back in? There are many organizations that will come pickup your items curbside and even give you a tax write-off slip for your goods. And if that’s too much trouble, post a quick ad in the “Free” section of Craigslist and you will have someone with a truck at your door usually within the hour.

YOU CAN DO IT!

Lots of love,
Mary

iQuilt

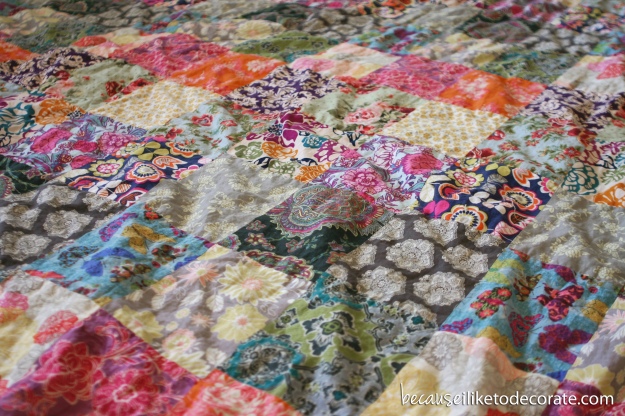
Do you sew? I don’t really consider myself a seamstress, but I like to play! I don’t have the patience for patterns or perfection. A few weeks ago, I had the urge to make a quilt. Something cozy, colorful, and really, really BIG! And the kind of quilt that is so comfy because it’s been washed so many times over the years. Maybe you have something like this passed down from your grandmother. Or maybe you found one at an estate sale. So I thought to myself, “Why not make a quilt that I can pass down to my children?” Something they will always remember…warm memories of snuggling on the couch as kids on movie nights or sitting on the big quit during park picnics. So off to the fabric store I went!

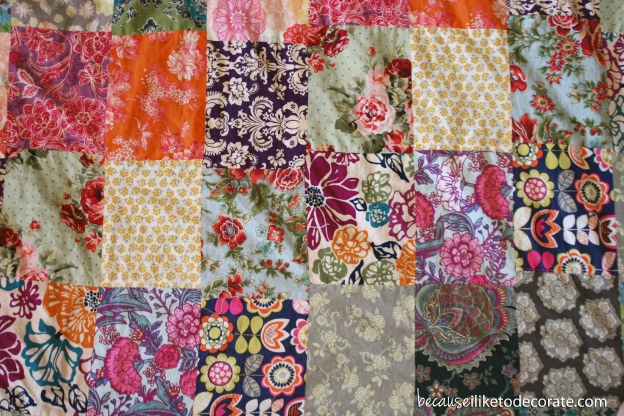
I picked 16 of the most colorful fabrics I could find. Do you ever look through the aisles of fabric and drool over all of the amazing patterns, but then stop yourself from buying them because you realize you don’t have any use for them? I’ve done that for years! But this time, I got to pick all of my favorites and actually put them to use! And for all of you at home that want to give this a try, I purchased 1/3 yard of each of the 16 fabrics I chose, 6 yards of fabric for the backing, thread, and the thinnest/cheapest batting I could find.

I sew flat things  I  becauseiliketodecorate.com

Why do we place so much importance on perfection when it comes to quilting? I only have two questions when it comes to a quilt: 1) is it pretty? And 2) is it cozy? Does it matter if your squares are perfectly aligned? No. If you can sew a semi-straight line, you, too, can make a quilt! Imperfection is what makes quilts beautiful, timeless, and treasures to be passed down for years.

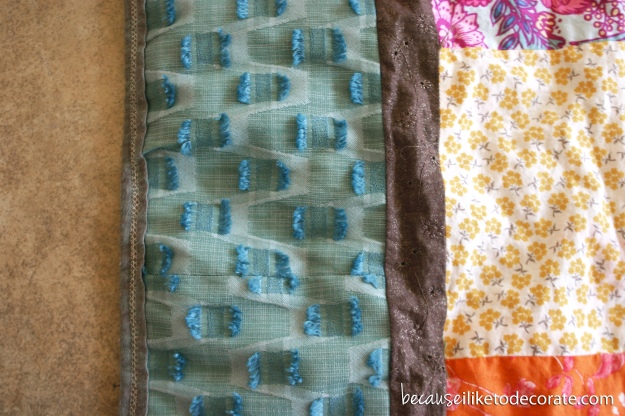
Once all of my squares were sewn together, I added a fun, teal home decor fabric and a brown pattern with gold flecks from my scrap bin (to caption the sides of the quilt).

quilt3


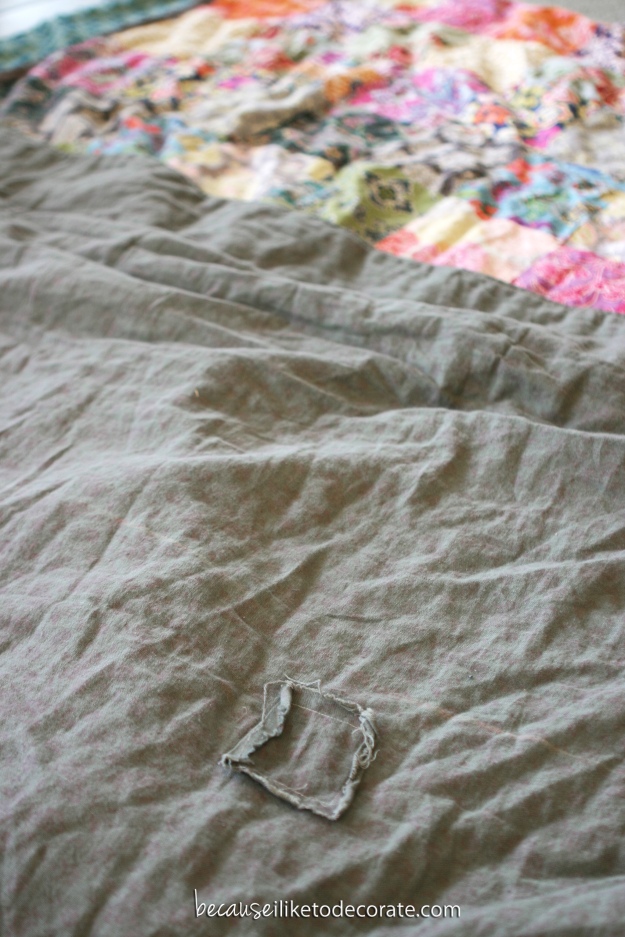
For the backing fabric, I chose a super-soft linen/cotton mix from the clearance section for a steal of a deal — $1.50 per yard! The fabric had a hole in it, but I thought that was the perfect opportunity to sew in an “on-purpose” patch — this only adds to the cozy factor!

I sew flat things  I  becauseiliketodecorate.com

I sew flat things  I  becauseiliketodecorate.com

I hope this inspires you to make one of your own! Don’t be scared of messing up — that’s the romance of creating such a treasured keepsake. We totally love our new quilt and I, myself, am inspired to make more! I’ll write a more detailed tutorial in another post. Stay tuned!

Lots of love,
Mary
Awesome things I found — kid’s edition

I can’t believe it, but as I’m typing this post I’m thousands of miles away from my home and my babies! They are well taken care of, but oh how I miss them so! And because I’m thinking about my children so very much, I thought it was appropriate to share with you some amazing web finds for the kiddos!

Check out this homemade play dough recipe from kidsactivitiesblog.com And made with only two ingredients!

20130715-235355.jpg

This is one of those, “why didn’t I think of that” moments. Thank you notes for the little ones to color! These cards are available on Etsy for purchase or as you can probably figure, make your own!

20130716-002126.jpg

Tastykitchen.com has a fabulous all-natural recipe for goldfish crackers!

20130716-003039.jpg

And because we all need a little laugh every now and then… (photo links to source)

20130716-003449.jpg

Lots of love,
Mary
Caspian Blue

Today was a fun day! Movies. Forts. Snuggles. Baking. Blogging. More Snuggles. And all the in-between. Sometimes a mom’s life is a whirlwind. I couldn’t tell you what all I did today… but it was a lot! I did take a few moments to snap some photos of a project I did for baby Jude’s room – A painted dresser/changing table. This was my very first experiment with High-Gloss paint!

I introduce, Caspian:
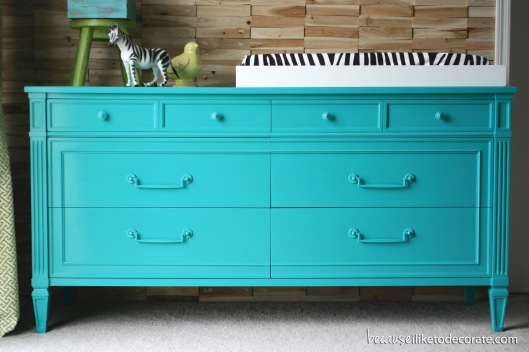
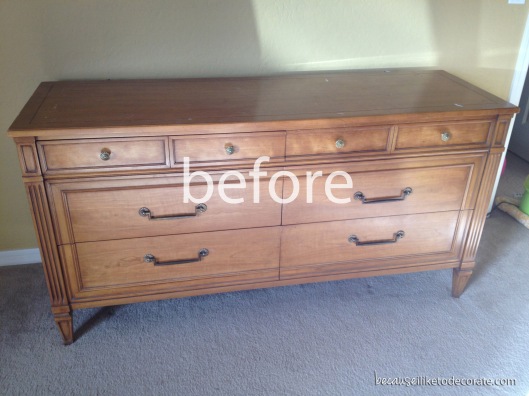
Caspian, blue dresser. Vintage HenredonCaspian is a Vintage Henredon Dresser that I picked up for a steal at one of my local thrift spots! The quality of this piece is remarkable and it was in excellent shape, save some deep scratches on the top of the dresser.
Caspian, blue dresser. Vintage HenredonThis piece is one of the few things I’ve painted where the original wood is so beautiful. <Don’t shoot me!> Trust me, I had a very hard time deciding. To paint… or not to paint, That is always the question. Once I decided that it was going into Jude’s room, I had my heart set on a bright teal high-gloss finish! There will be others to show restraint with.
Caspian, blue dresser. Vintage HenredonThe color is “Intense Teal” by Behr. I chose their Hi-Gloss Enamel for a super durable shiny finish. To help it adhere, I began with a coat of Glidden Gripper Grey. Gripper is an amazing primer that will literally stick to anything without flaking…even glass!
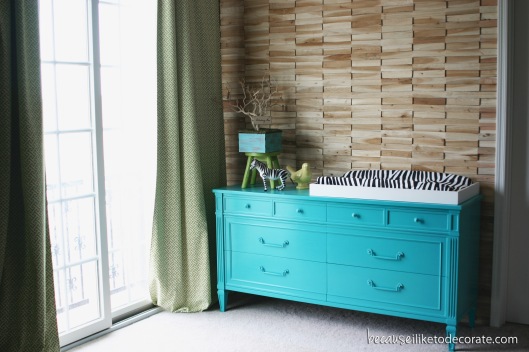
Caspian, blue dresser. Vintage HenredonThe choice to paint the hardware was an afterthought but really completes the look. Although this piece has a classical style, the paint has really transformed the look to more of a sleek modern or transitional feel. Perfect for my baby boy!
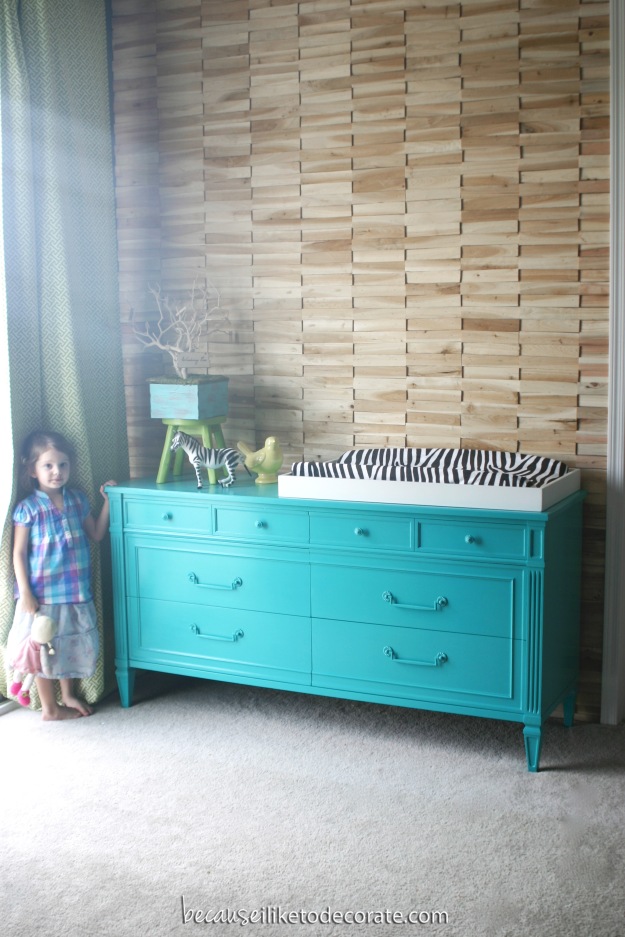
Corbinbluedresser4Photo bombed by a little cutie in the corner! My baby Gabby likes to be in front of the camera. (I wish you could see the smile on my face because this little one melts my heart to pieces!)

Sidenote: Nope, I’m not ignoring the fact that this dresser is standing in front of an AMAZING wood wall that I haven’t told you about yet! Thought I’d give you a little sneak peek. Truth is, it isn’t finished yet. I’m a little stumped on how to finish the wood. So maybe you guys can help a girl out!

Should I…
A. Keep the natural unfinished wood look?
B. Use Teak oil for a natural slightly darker finish?
C. Finish with a honey toned stain (Which would coordinate with the crib)?

Lots of love,
Mary
Special Delivery

I’M ALIVE! Okay, so it’s been ages since I’ve posted, let alone done any sort of DIY project. And here it goes… I’m pregnant! Again! I bet you’re saying to yourself: “Didn’t she just have a baby?” Yes, yes I did. Titus James was born March 19, 2012 and the new baby is due March 1, 2013. We were definitely surprised to be pregnant again so soon, but we are absolutely more than ecstatic! And yes, a little crazy :)

Source: andersondesigngroupstore.com via Mary on Pinterest

My first trimester was a little rough this time around and I found myself on the couch a lot! Sometimes, it’s perfectly okay to throw your hands up and surrender. I promise, it’s okay. My energy is starting to return and I’m ready to get back on track. So now, as I try to piece my home back together, I have a new resolve for the next year or so. It’s time to finish what I’ve started. I have so many projects that have been in mind and more importantly, halfway done in my kitchen, dining room, living room, garage, etc… that need to be completed. I’m going to slow down, do what I can (when I can), enjoy my children, and finish things. My husband even joined in on my DIY interest and wants to help me finish some of the larger projects! And what I mean by “help me” is that he’ll be doing the heavy lifting while I sit and point. But in all reality, I’ll probably TRY to climb the ladder at eight months pregnant but will quickly be talked down — or else!

I do have a few things in mind to show you this week and I’m anxious to take some photos!
Lots of love,
Mary
Baby Boy’s Room – Planning & Inspiration

Better late than never! :)  Now that the girls’ room is almost complete, I can turn my attention to my precious baby boy’s room. I’ve been gathering inspiration and I’m super excited to share my plans with you!

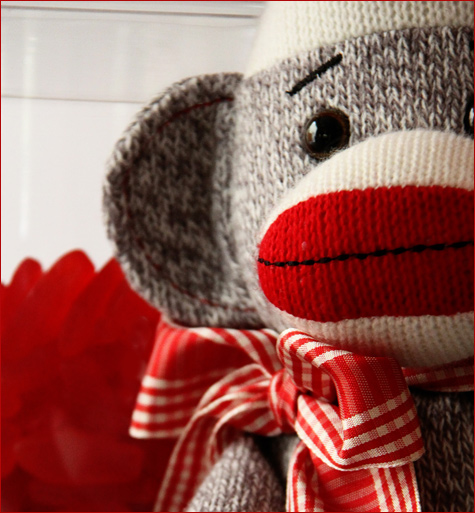
I knew as soon as I saw him, the sock monkey! His cozy fabric and textures mixed with the handsome color pallet, this was going to be my handsome boy’s room theme. I’m not really a “theme” room type of person. To me, themes can easily go way overboard and you find yourself surrounded by toy trains, or bears, or mickey mouse. It’s a fine line to carry a theme and keep the design flowing properly. Rule #1, just because its a sock monkey, doesn’t mean it gets automatic clearance into the room.

Sock Monkey Theme Baby's Room Design  I  becauseiliketodecorate.com
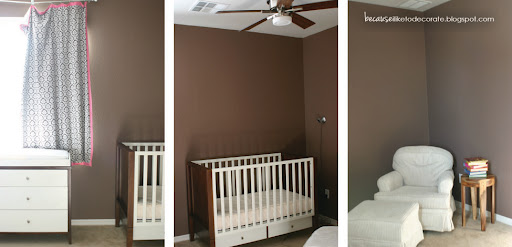
The good news is I already have all the furniture pieces needed. When we purchased Gabby’s crib set, we thankfully chose a gender-neutral design. Other than that, it’s a blank slate. This is going to be fun! Check out the before pics — this is how the room looks today:
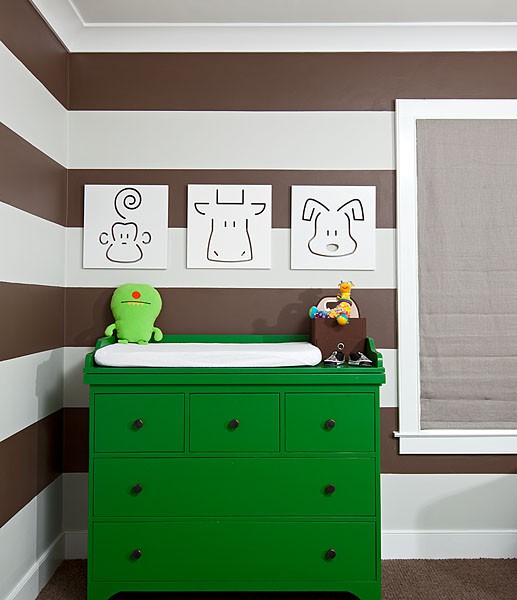
Yes, I still need to take down Gabby’s drapery panel. :)  I’m thinking about keeping the brown wall colors and adding a wide stripe design using a red color. I found this stripped wall on Pinterest and just love the scale.
Baby's Room Inspiration  I  becauseiliketodecorate.com


I’ve just got three questions: #1. Horizontal or vertical?  #2. Do I bring in white to brighten up the space?  #3. What about stripes on the ceiling instead?

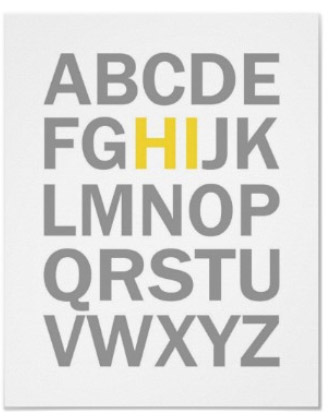
Turning my attention to the walls, I saw this graphic and originally wanted to use the idea for the girls’ room. But thinking about it more, wouldn’t this look spectacular as a pop out graphic above the crib? I would be painting either wooden or cardboard letters.

Baby's Room Inspiration  I  becauseiliketodecorate.com
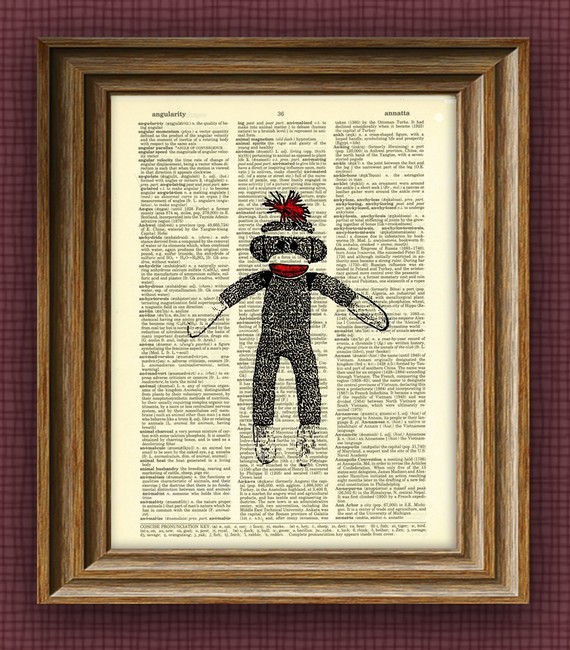
Also loving this print found on Etsy! Could I pull it off myself? Or maybe just purchase this one? It’s fab!
Sock Monkey Themed Room  I  becauseiliketodecorate.com
Source: etsy.com via Mary – on Pinterest


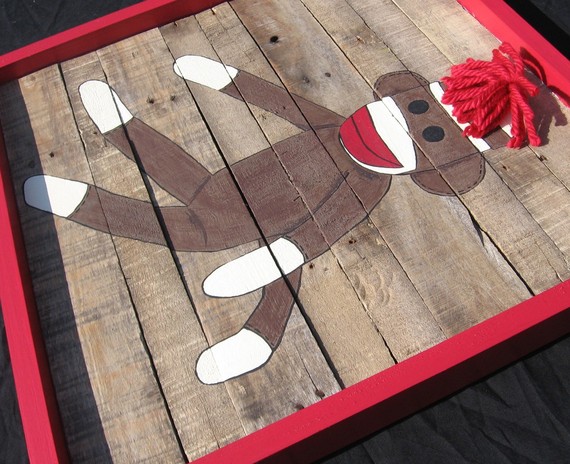
Adding a rustic element would be nice. I’d like to create a version of this on three scrap plywood boards…but maybe more modern/pop art styling.

Sock Monkey Themed Baby's Room  I  becauseiliketodecorate.com
Source: etsy.com via Mary – on Pinterest
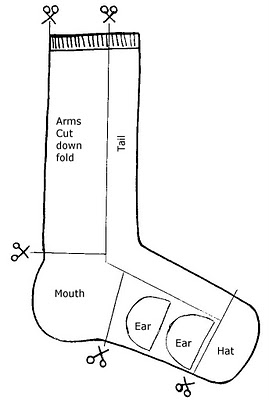
I don’t think I would ever take the time to try and make my own sock monkey — not my forte. But I still love the tutorial graphic as wall art!
sock-monkey-pattern


Now onto fabric and textures. I want to pickup the warm coziness aspect of the sock monkey. This fabric is a must!

sock-monkey-texture
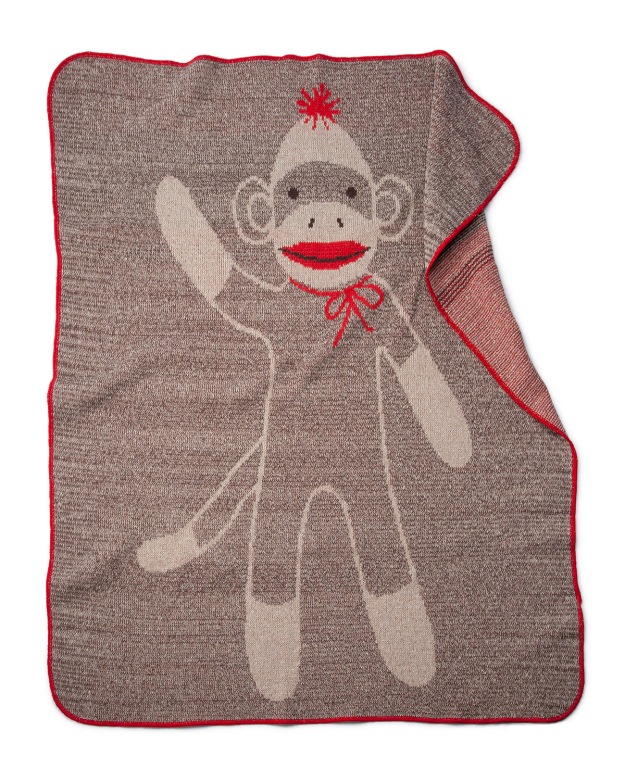
And how do you NOT love this blanket?!
Sock Monkey Blanket
I really like the balance of this room. Very well done! The draperies are amazing and oh to get my hands on one of those little red bicycles!
sock-monkey-crib-bedding_medium


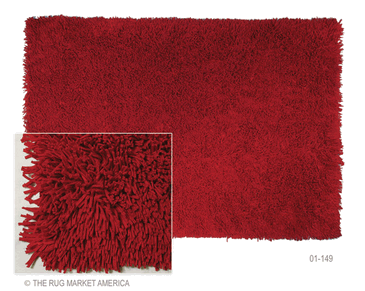
And last but not least, the red shag rug is a must! :)

Pasta-Red-Shag-Rug
Source: google.com via Amber on Pinterest
I’m really excited to see how this is all going to come together! Stay tuned! :)
Lots of love,
Mary
The Girls’ Room Progress 1.4 – Toddler Bookshelf Wall

Before I get to the goods, I wanted to share with you that baby boy Spitzer should arrive any day now!!! Lately, my days have been filled with last-minute Baby’s R Us runs, putting the swing together, washing and putting away all his clothes, etc. Who knows, maybe my next post will be introducing our little guy. :)

When tackling the toddler bookshelf, I had a couple different options before me. I thought about constructing and painting the shelving myself — the cheapest and most time-consuming option. Then I remembered a couple Pinterest options I had seen where IKEA spice racks or picture shelves were used for this purpose. So, I went to IKEA and really liked the picture frame shelving. And I REALLY liked the no-wood-cutting, no-painting, and no-assembly-required part!

On a normal day, I may have penny pinched and spent the time to try and make something myself. But since I’m 8+ months pregnant, $15 per shelf didn’t seem like that big of an expense. And all I had to do was open the package, level the shelf, and screw it to the wall. Done!

The girls LOVE it! Adi keeps bringing me books and telling me that she found a new one that we didn’t have before.

I love that the bookshelf doesn’t take up valuable floor space, and it creates a nice visual for the wall. It’s like artwork and storage in one! :)

I have just a few more elements to finish in the room before I show you the complete reveal. If you missed the design planning and inspiration for this room, It can be seen here.

Lots of love,
Mary
Custom painted shoe bench for my babies

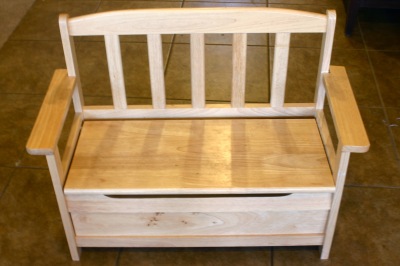
I was given this bench by a family member whose children have grown past their toddler bench phase. I was excited because the seat lifts for additional storage and my girls are all about seating that is “just my size” — as Adi likes to put it. We’ve been using it as shoe storage downstairs, so we don’t have to go all the way up to their rooms when we need to grab shoes quickly and leave the house. I thought it needed some updating to blend in with our other furniture, so out came the paint brush.

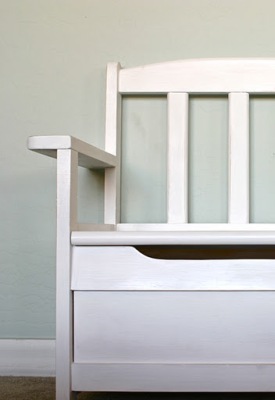
This is my final product:

And here is what the bench looked like before:

I first needed to use some Liquid Nails to repair the loose armrest. Then the next day, I got to work.

I chose Annie Sloan Pure White for the base, it took two coats.

After that was dry, I sketched out my lettering. Remembering a tip that I recently saw on Pinterest (see tutorial here). I printed out the font that I had previously chosen in the desired size and traced the lettering with a ballpoint pen. This left an imprint on the freshly painted bench. I was then able to paint inside my imprint with a mixture of AS chalk paint in Pure White mixed with a little Graphite.

Once everything was completely dry, I distressed lightly and finished with AS clear wax. Now my girls have a pretty place to put their shoes.

Lots of love,
Mary
Linked up here:
DomesticallySpeaking Beyond The Picket Fence Photobucket HookingupwithHoH Somewhat Simple shabby creek cottage Boogieboard Cottage Stuff and Nonsense Organize and Decorate Everything Saved by Suzy Furniture Feature Fridays The Shabby Nest Laugh, Love, & Craft Chic on a Shoestring Decorating 504 Main Lovely Crafty Home Redoux Photobucket Link Party

DIY oversized growth chart ruler

I did it! I think this was one of the first ideas that was pinned from Pinterest that I actually executed. The girls have been growing so fast and I felt like each day that went by I was missing the opportunity to capture those memories. So off to Home Depot I went!
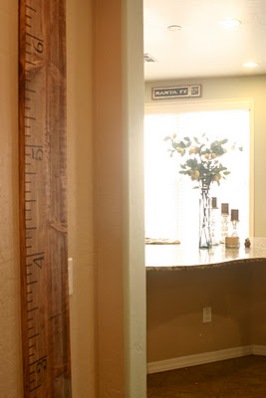
This is a photo of my final product:

And here is the original inspiration photo that I saw on Pinterest. Different versions of this are all over the internet these days. I believe this idea was originally done and sold by Pottery Barn, then all of the DIYers (like myself) decided, “Hey, we can make this for WAY cheaper.”

If you know me, you know that I’m not one for following directions well. I like to find shortcuts at every turn and I often get myself in trouble because of it. In my defense, I also find some terrific shortcuts! All that to say, I haven’t read any of the other tutorials out there. I bet they are fantastic and way better than mine. I can imagine it’s been done with paint and probably even cut out laminate pieces. I’m too impatient and I just looked at the photo and went for it.

So I started by purchasing a piece of wood from Home Depot. You may not know it, but they sell pre-cut and pre-finished wood pieces in various sizes. I didn’t know that until just recently. I picked up a piece of pine wood 6′ tall and 9″ wide.

I wasn’t about to try and paint the letter detailing with a brush because, quite frankly, I don’t trust myself to paint that well without a stencil. And I was too impatient to run out and get a number stencil, so I decided to freehand with pencil first using a small scale ruler as my guide for the font. Then, I used a Sharpie over the pencil for the permanent markings. It worked extremely well. I was concerned that the Sharpie would bleed, but as it turns out I didn’t have any trouble with that at all.

I then coated the entire board with Minwax Bombay Mahogany wood stain, let it dry, then finished it off with a light coat of Annie Sloan soft wax. I used wax rather than polyurethane because I didn’t want to deal with the smell and I just love the finish of soft wax. It’s easy to use and provides a nice, smooth texture without being too shiny.

I’m more than pleased with the results! This is now such a treasured piece in the home. I look at it daily and imagine all the markings that we get to imprint over the years as our children grow.

After purchasing and trying out several pens, I finally found one that would write over the nice wax finish. Again, good ol’ Sharpie — I found out that they make a paint pen! Worked like a charm. :)

By far, this is one of my favorite projects to date!

Lots of love,
Mary

—————————————————————————————————–

Update: 06.04.12

I’ve been asked about how to attach the piece to the wall, since it is so large. I used some basic hooks that can be found at any hardware store. I like these because they aren’t visible from the front of the board and they are very secure.

I then used drywall screws into the wall rather than nails. Leave them sticking out a little so that the hooks will fit nicely. I LOVE drywall screws and use them for just about anything.

Hope this helps!
Lots of love,
Mary
Linked up here:
Lovely Crafty Home