Tag Archives: modern

Kitchen Makeover 1.4 – Island Molding

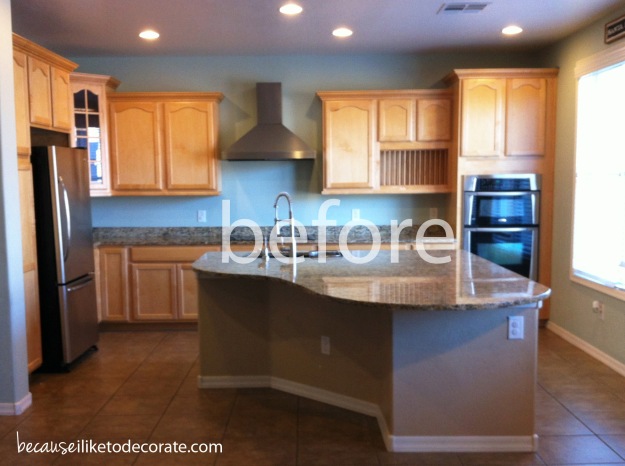
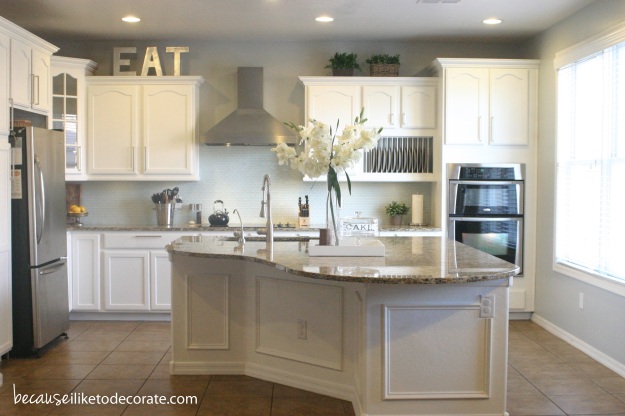
For the final post in my Kitchen Makeover series, I’m sharing with you the kitchen island molding project. This is another example of how something so simple and inexpensive can create a big difference in your space!

Kitchen Makeover  I  becauseiliketodecorate.com

Kitchen Makeover  I  becauseiliketodecorate.com

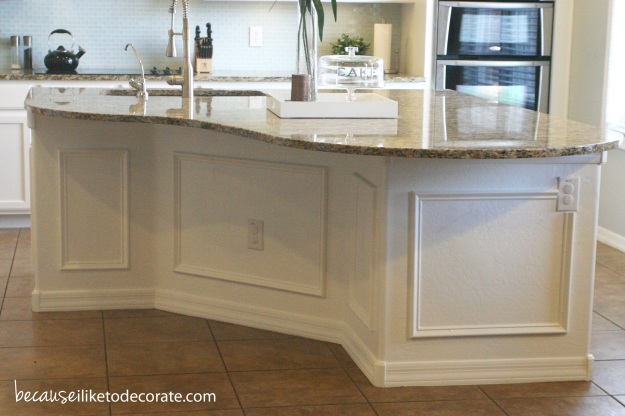
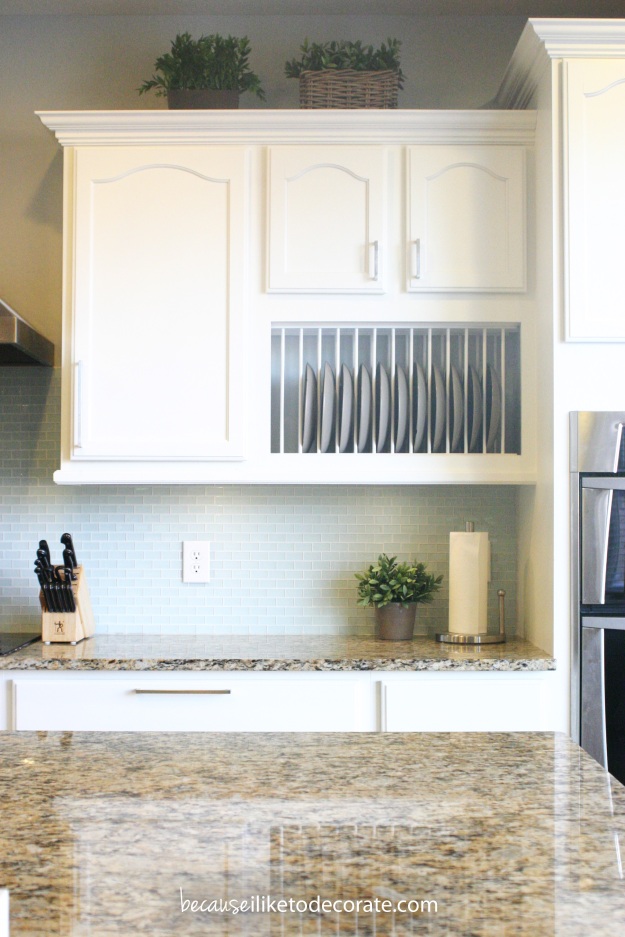
The molding creates a custom look at a low price by creating faux wainscoting on the island base. Painting this area the same white color as the cabinets makes the entire kitchen look that much bigger!

Kitchen Makeover  I  becauseiliketodecorate.com

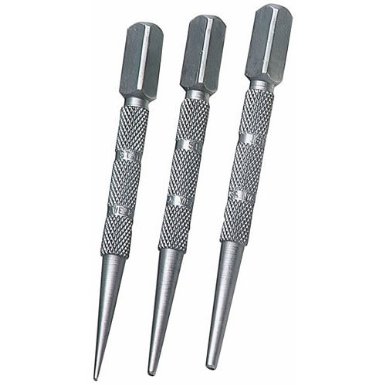
This is not expensive wainscot paneling! I purchased decorative molding from the hardware store for only $.90 per linear foot. You can use a miter saw or a hand box saw to cut your 45 degree angles. Use wood glue to set each piece into place and secure with a nail gun. You could get away with using just a hammer if you have the tool pictured below that will set your nail into the molding without damaging the molding with your hammer.

Nail Setter Set

Next, fill your nail holes with a wood filler and make sure to use caulking on every visible seam! It will look like a cheap job if you don’t fill in all your cracks. Now you’re ready to paint the wall!

This process worked so well, I’ve started to add molding to the rest of the house as well. I have plans for the staircase area as well as the dining room! I love the custom, high-end look this process creates, and I especially love the fact that it can be done at such a low price-point.

Check out all the posts in the Kitchen Makeover series!

kitchenseries1 kitchenseries2 kitchenseries5 kitchenseries3

Lots of love,
Mary

Wood shim shoe cabinet — and a prize contest!

Check it out, friends!

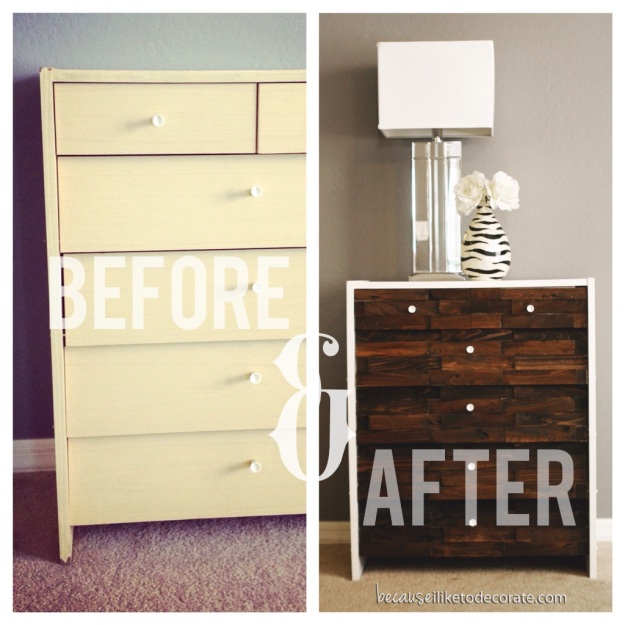
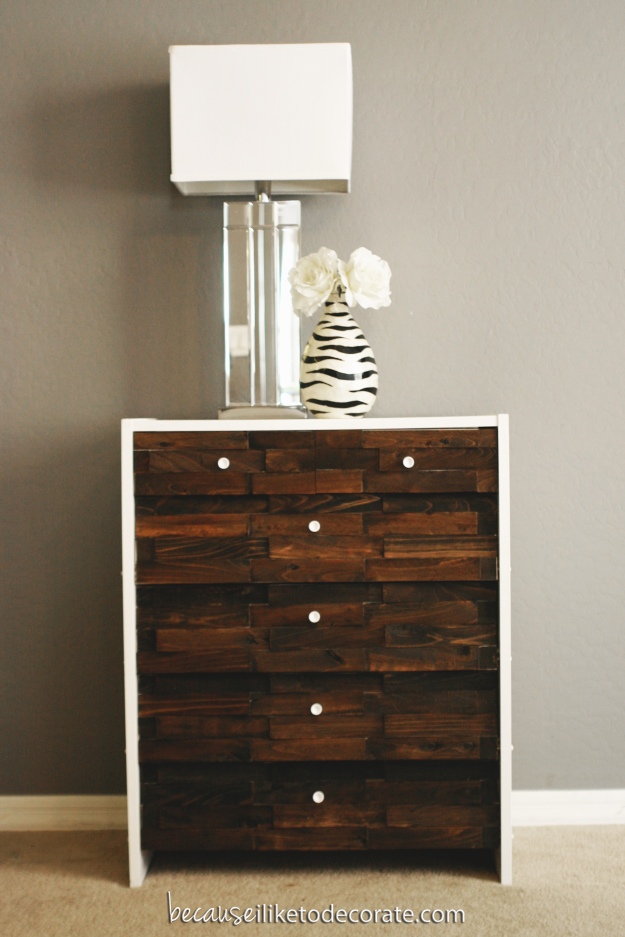
I picked up this bad boy at Goodwill for only $15! It’s actually a shoe cabinet — the “drawers” fold out! This is NOT a quality piece. Notice the paper laminate peeling from the corner of the before pic? This was a practical purchase for my family to HIDE THE SHOES! (Because shoes are always a problem.) Can anyone else relate?

Wood shim shoe cabinet  I  becauseiliketodecorate.com

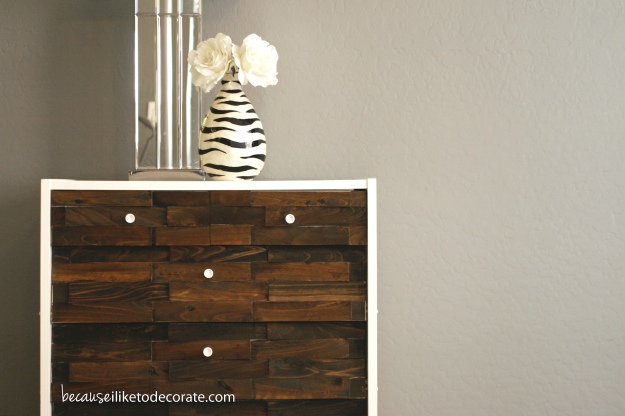
This is an example that shows just how much you can transform what was simply a boring piece of furniture.

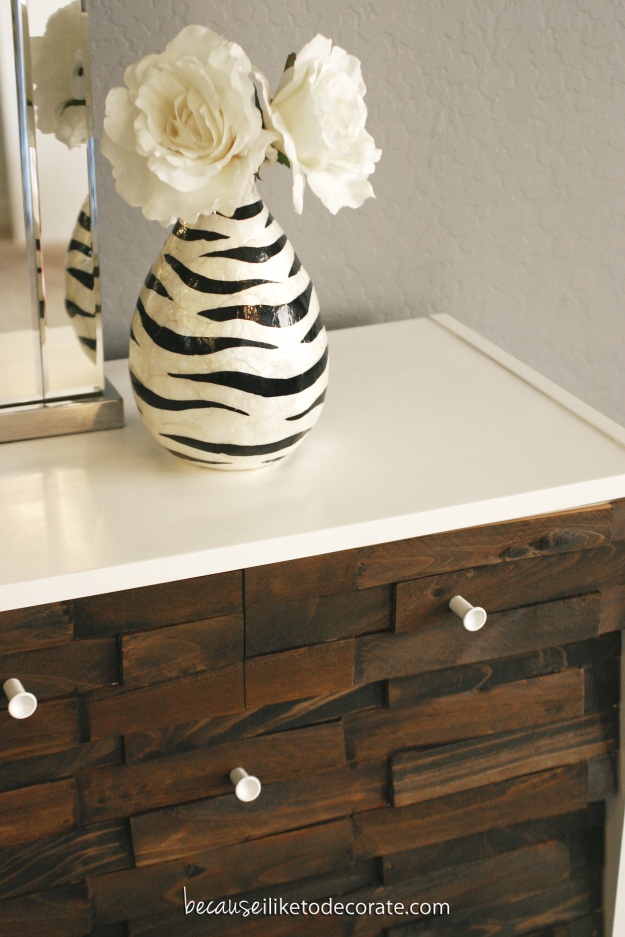
You’re probably wondering what products were used, etc. So here we go. Let’s start with my paint choice for the exterior. I used Glidden’s Gel Technology High-Gloss Trim & Door paint in Bright White and also painted the knobs with the same paint.
Wood shim shoe cabinet  I  becauseiliketodecorate.com

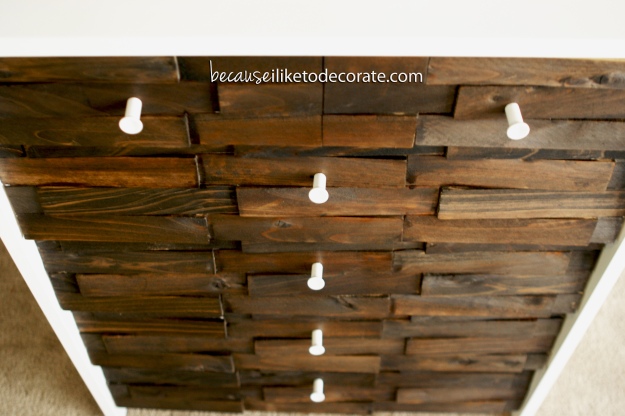
After planning out my alternating wood pattern, the shims were stained with Minwax Jacobean and glued onto the face of the cabinet “drawers” using Liquid Nails. This needs to dry for 24hrs and you’ll need clamps to hold the pieces into place as they dry. I used a miter saw to make a few cuts, but you could probably get away with just a hand saw since the shims are so thin.Wood shim shoe cabinet  I  becauseiliketodecorate.com

Wood shim shoe cabinet  I  becauseiliketodecorate.com

The best part about this project is how budget friendly it was. Wood shims are about $1.25 for a pack of 12, and the paint and stain were both purchased for another project — so that didn’t cost me anything. That brings my total to only $20 for a custom shoe cabinet that has that high-end look without the high-end price!

Wood shim shoe cabinet  I  becauseiliketodecorate.com

Contest

Now let’s talk about the contest portion of this post! This furniture piece is nameless. If you haven’t noticed by now, I usually name each furniture makeover something that fits its new character and style. So what do you think? Do you have a name for him or her? There are many ways that you can enter and increase your chances! Annnnnnnddddddddd……GO!

UPDATE: I’m having a bit of trouble with WordPress accepting the contest widget (hoping to get this fixed). Please click on the giveaway link below to enter the contest! There are 8 different ways to throw YOUR NAME in the hat!

CLICK HERE TO ENTER THE GIVEAWAY!

THE WINNER WILL RECEIVE COFFEE ON ME, A $25 GIFTCARD TO STARBUCKS!

Starbucks logo

Lots of love,
Mary

Linking up here:


Furniture Feature Fridays

Caspian Blue

Today was a fun day! Movies. Forts. Snuggles. Baking. Blogging. More Snuggles. And all the in-between. Sometimes a mom’s life is a whirlwind. I couldn’t tell you what all I did today… but it was a lot! I did take a few moments to snap some photos of a project I did for baby Jude’s room – A painted dresser/changing table. This was my very first experiment with High-Gloss paint!

I introduce, Caspian:
Caspian, blue dresser. Vintage HenredonCaspian is a Vintage Henredon Dresser that I picked up for a steal at one of my local thrift spots! The quality of this piece is remarkable and it was in excellent shape, save some deep scratches on the top of the dresser.
Caspian, blue dresser. Vintage HenredonThis piece is one of the few things I’ve painted where the original wood is so beautiful. <Don’t shoot me!> Trust me, I had a very hard time deciding. To paint… or not to paint, That is always the question. Once I decided that it was going into Jude’s room, I had my heart set on a bright teal high-gloss finish! There will be others to show restraint with.
Caspian, blue dresser. Vintage HenredonThe color is “Intense Teal” by Behr. I chose their Hi-Gloss Enamel for a super durable shiny finish. To help it adhere, I began with a coat of Glidden Gripper Grey. Gripper is an amazing primer that will literally stick to anything without flaking…even glass!
Caspian, blue dresser. Vintage HenredonThe choice to paint the hardware was an afterthought but really completes the look. Although this piece has a classical style, the paint has really transformed the look to more of a sleek modern or transitional feel. Perfect for my baby boy!
Corbinbluedresser4Photo bombed by a little cutie in the corner! My baby Gabby likes to be in front of the camera. (I wish you could see the smile on my face because this little one melts my heart to pieces!)

Sidenote: Nope, I’m not ignoring the fact that this dresser is standing in front of an AMAZING wood wall that I haven’t told you about yet! Thought I’d give you a little sneak peek. Truth is, it isn’t finished yet. I’m a little stumped on how to finish the wood. So maybe you guys can help a girl out!

Should I…
A. Keep the natural unfinished wood look?
B. Use Teak oil for a natural slightly darker finish?
C. Finish with a honey toned stain (Which would coordinate with the crib)?

Lots of love,
Mary

Victoria – My first upholstery project

When you think about upholstery, it sounds very overwhelming. Like something that you should leave to the pros, right? Well, if you know me, I’ll try anything! And upholstery is no exception — although this little chair did sit in my home for about a year before I mustered up the courage to tackle it.

Meet Victoria:
#upholstery, #vintagechair, #becauseiliketodecorate, #chic, #pink

This job was a part of a custom design project that I was blessed to be able to do. Hoping to show you the entire room soon!

The first step to upholstery is to remove the old fabric. It’s helpful to pickup some upholstery tools from your local craft store to assist with removal of staples, etc. The best tip I can give you is to take lots of photos as you are taking apart the chair. That way you know how everything is supposed to go back together once you’re ready to staple on your new fabric.
upholstery3 upholstery2

Once everything is removed, this is your opportunity to paint or refinish the base of your chair. I chose a custom-mixed bright pink, distressed it, and finished it off with Annie Sloan Dark Wax. The dark wax really helped bring out the detail and beauty of the frame.

When you’re ready to put your chair back together, trace and cut your new fabric from the old fabric pieces and start putting each piece back the same way it came off. You will need a heavy-duty staple gun and a pair of strong, steady hands! Each piece will need to be stapled first at the top, then bottom, then each side — pulling the fabric snug as you staple around to make sure it fits evenly.

Once the fabric is complete, you’ll need to cover all those staples with something. If you choose nailheads, use a rubber mallet (also found at your local craft store). This takes some practice and I would say was the hardest part of the project! Another option is to hot glue fabric piping or trim.

If you take it slow, it’s not as hard as it looks. Victoria is a vintage beauty and she’s just perfect! Now that I’ve gotten my feet wet (so to speak), I’m anxious to try something a little harder next time.

Lots of love,
Mary

Linked up here:
http://bebetsy.com
http://www.dukesandduchesses.com

Furniture Feature Fridays

Kitchen Makeover 1.3 – Backsplash

My friends, I owe you a long-overdue tutorial on the backsplash install as a part of my kitchen makeover. This project was my very first attempt at DIY tiling and I was a bit nervous to experiment in the kitchen, of all places. Tile isn’t exactly something that’s easy to fix if you make a mistake.

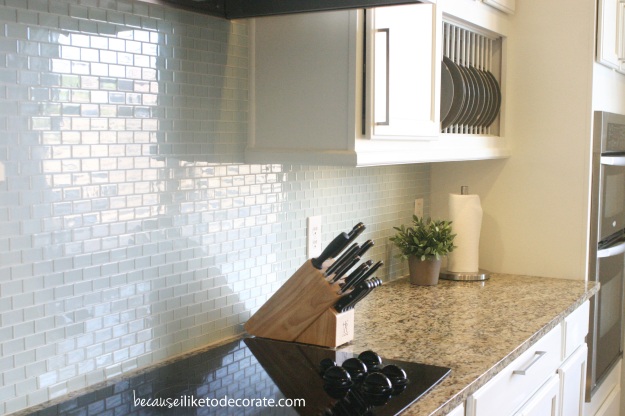
I chose a small subway-patterned glass tile in a sea blue color. I love a good deal, so I was ecstatic when I saw this beautiful tile on clearance at my local Home Depot a couple years ago (yes, it’s been sitting in my garage this whole time).

kitchenreveal3

I am IN LOVE with glass tile! The way the light bounces off the backsplash now brings me so much joy! It’s like jewelry for your kitchen — a little bling!

So the question is… How did I do it? Well, as I said, I was a bit nervous to experiment and do my first tiling job in the kitchen so I took the easy way out and used a fab product called SimpleMat Tile Setting Mat.

It’s basically a “sticker” of sorts that you use in place of mixing thin set. Super easy and no mess! It is quite a bit more expensive than thin set, but still way cheaper than hiring a pro! The instructions on the back are easy to follow and dummy-proof. Trust me! *wink*

backsplash2013.1

After setting the tile in place, I used a grout that came pre-mixed in a tub. You’ll push the grout into the tile spaces with a tool called a float, wipe off the excess, and wait until the next day for the grout to dry before polishing the surface. Step-by-step directions are included with both the tile setting mat as well as the pre-mixed grout, which makes this project way easy for an eager DIY enthusiast!

backsplash2013.2

My biggest tip for this project: make sure you wipe all your edges clean before letting the grout dry. There are a couple spots where I wish I would have been more of a perfectionist. Other than that, I love love love the results and would totally do it again in a heartbeat!

kitchenreveal4

Check out all the posts in the Kitchen Makeover series!

kitchenseries1 kitchenseries2 kitchenseries5 kitchenseries3

Lots of love,
Mary

Be still my heart…

I nearly died today when I saw this project in my inbox! It’s pure genius and just my style! The fab ladies over at East Coast Creative posted a tutorial for a DIY Wood Slice Wreath. I’m so excited about it, that I decided to push back the post I had scheduled for this evening and share this excitement with you – my friends.

My only dilemma is that I don’t have a chainsaw, nor a tree trunk, nor someone to slice the wood for me…

Lots of love,
Mary

Surprise! A Mini Bedroom Makeover

I told you I had something up my sleeve! It all started when my husband had to go on a two-day business trip to Dallas. After he left on Tuesday morning, I got to thinking… what if I could pull off a mini master bedroom makeover before he returned on Wednesday evening? You see, our master bedroom has been neglected big time! Because nobody goes up there, it’s received no attention whatsoever. I wanted my husband and I to have a nice place to retreat to at the end of the day.

Let me preface this by saying that it was a “mini” makeover. I had less than 24 hours and two children to care for at the same time! I have many, many more plans for this space, so look for “master bedroom makeover 2.0” in the future. :)  Without further ado… introducing the final product:

And for comparison, this is what our master bedroom looked like before.

Does this look at all familiar? Since moving in, we just placed our furniture in the room and walked away. Have you done the same thing? Notice how the cords are stretching to plug in all our “necessities.” And one of our lamps were moved to the guest room to accommodate out-of-town company. Tacky, I know… it’s embarrassing.

First things first, we needed an actual bed frame — or in the very least, a headboard. Since upgrading to a king-size bed, our pretty queen-size Z Gallerie bed that we had been using moved to the guest room. I’ve seen DIY headboards all over the internet, so that’s what I set out to do. Fortunately, Home Depot stocks 6′ long pre-cut boards for about $5.50 a piece. I used six boards, stained them, and screwed them to the wall using a course drywall screw.

We also needed some lighting changes, so I picked up these nightstand lights as well as the ceiling fan and called a very generous friend to come install them last-minute for me.

I brought in Hayden – the antique cedar chestto frame the foot of the bed, and also picked up a few nightstand accessories…

…including this super-cool motorcycle statue that I couldn’t resist for my husband’s side of the bed.

To keep it practical, I used books that my husband actually reads topped with a couple vintage, old-looking books.

And finally, I purchased this rug to frame out the space and add a little texture and dimension.

Now that this much is done, I want to do more! (Oh the lack of time and resources). Until next time…

**Update: I have recently posted a tutorial specifically dedicated to the headboard portion of this project. Click here to view.**

Lots of love,
Mary

Linked up here:

Bennett – A restored mid-century modern office desk

Drumroll please… introducing “Bennett.”

Remember a week or so ago, I picked this little guy up at Goodwill? Let me remind you…

Yes, Goodwill is a bit messy!

I used a homemade chalk paint recipe out of Behr Midnight Dream. Like I said before, I have plans to complete a more thorough chalk paint comparison in the future. I’ll keep you posted. I don’t really have enough info for a thorough analysis yet.

After two coats of the blue, I distressed, applied Annie Sloan clear wax, then taped off the white stripes. I used Behr Off White for the stripes.

After distressing and waxing again, I added the AS dark wax to age it up a bit. That’s when the piece really popped!

I kept the original brass hardware and just polished it up a bit.

I’m really happy with the results. Perfect for a boy’s room or even a bachelor pad! He looks rich and sophisticated.
Bennett has already found a home. He was sold before I had a chance to place the ad. And the best part is that he is staying in the family, so I can visit him anytime I want!
Lots of love,
Mary

I’m linked up here:

Chic on a Shoestring Decorating Furniture Feature Fridays Stuff and Nonsense The Shabby Nest IhookedupwithHoHlamespice Tickled Pink at 504 Main Redoux Lovely Crafty Home Photobucket Link Party Making Monday Marvelous Linky Party